Add a stylesheet
Cascading stylesheets represent one of the most common ways to customize the user experience for an application. This tutorial illustrates how to add a stylesheet when you use React to create a new front-end for your project. If you already know how to add cascading stylesheets (CSS) to a React-based project, you can skip this tutorial.
| This tutorial illustrates using the React framework to manage the Document Object Model (DOM) for your canister. Because React has its own custom DOM syntax, you need to modify the webpack configuration to compile the front-end code, which is written in JSX. For more information about learning to use React and JSX, see Getting started on the React website. |
Before you begin
Before starting the tutorial, verify the following:
-
You have
node.jsinstalled for front-end development and can install packages usingnpm installin your project. For information about installing node for your local operating system and package manager, see the Node website. -
You have downloaded and installed the DFINITY Canister SDK package as described in Download and install.
-
You have installed the Visual Studio Code plugin for Motoko as described in Install the language editor plug-in if you are using Visual Studio Code as your IDE.
-
You have stopped any Internet Computer network processes running on the local computer.
Because of significant changes to the handling of HTTP requests and front-end assets, this tutorial requires you to use the DFINITY Canister SDK version 0.7.0 or later. For an overview of what’s changed, see this article.
|
Create a new project
To create a new project directory for your custom front-end application:
-
Open a terminal shell on your local computer, if you don’t already have one open.
-
Change to the folder you are using for your Internet Computer projects, if you are using one.
-
Verify that you have
node.jsinstalled locally, if necessary. -
Create a new project by running the following command:
dfx new contacts -
Change to your project directory by running the following command:
cd contacts
Install the React framework
if you’ve never used React before, you might want to explore the Intro to React tutorial or the React website before editing the front-end code.
To install required framework modules:
-
Install the React module by running the following command:
npm install --save react react-dom -
Install the required TypeScript language compiler loader by running the following command:
npm install --save typescript ts-loader -
Install the required style loaders by running the following command:
npm install --save style-loader css-loaderIf the
npm installcommand reports a vulnerability, you might also want to run thenpm audit fixcommand to attempt to fix the vulnerability reported before continuing.As an alternative to installing these modules, you can edit the default package.jsonfile to add dependencies for your project.{ "name": "contacts_assets", "version": "0.1.0", "description": "", "keywords": [], "scripts": { "build": "webpack" }, "devDependencies": { "@dfinity/agent": "0.7.2", "assert": "2.0.0", "buffer": "6.0.3", "events": "3.3.0", "html-webpack-plugin": "5.3.1", "process": "0.11.10", "stream-browserify": "3.0.0", "terser-webpack-plugin": "5.1.1", "util": "0.12.3", "webpack": "5.24.4", "webpack-cli": "4.5.0" }, "dependencies": { "css-loader": "^5.2.1", "react": "^17.0.2", "react-dom": "^17.0.2", "style-loader": "^2.0.0", "ts-loader": "^8.1.0", "typescript": "^4.2.4" } }The version of the JavaScript agent in this example
package.jsonfile is0.7.2. In most cases, however, you would want to use the latest version of the agent available. When you create a new project, thedfx newcommand automatically retrieves the latest version of the JavaScript agent for you. You can also manually retrieve the latest version after creating a project by running thenpm install --save @dfinity/agentcommand.
Modify the default program
For this tutorial, you are going to modify the main program to with code that allows you to store and look up contact information.
To modify the default program:
-
Open the
src/contacts/main.mofile in a text editor and delete the existing content. -
Copy and paste the following sample code into the file:
import List "mo:base/List"; import AssocList "mo:base/AssocList"; actor Contact { var contacts : ContactsMap = List.nil(); type Name = Text; type Phone = Nat; type Entry = { name : Name; address1 : Text; address2 : Text; email : Text; phone : Phone; }; type ContactsMap = AssocList.AssocList<Name, Entry>; func nameEq(lhs : Name, rhs : Name) : Bool { return lhs == rhs; }; public func insert(name : Name, address1 : Text, address2 : Text, email : Text, phone : Phone) : async () { let newEntry : Entry = { name; address1; address2; email; phone; }; let (newContacts, _) = AssocList.replace( contacts, name, func(n: Name, m: Name) : Bool { n == m }, ?newEntry ); contacts := newContacts; }; public query func lookup(name : Name) : async ?Entry { return AssocList.find(contacts, name, nameEq); }; }; -
Save your changes and close the
main.mofile to continue.
Modify the front-end files
You are now ready to create a new front-end for your program.
-
Open the webpack configuration file (
webpack.config.js) in a text editor. -
Modify the front-end entry to replace the default index.html with index.jsx.
entry: { // The frontend.entrypoint points to the HTML file for this build. // Use the next line to change the extension. For example, the // default configuration changes the extension to `.js`. index: path.join(__dirname, info.frontend.entrypoint).replace(/\.html$/, ".jsx"), }, -
Locate the commented example for the
modulekey above thepluginssection, then uncomment the following lines:module: { rules: [ { test: /\.(js|ts)x?$/, loader: "ts-loader" }, { test: /\.css$/, use: ['style-loader','css-loader'] } ] },These settings enable your program to use the
ts-loadercompiler and to import CSS files. -
Save your changes and close the
webpack.config.jsfile to continue. -
Create a new file named
tsconfig.jsonin the root directory for your project. -
Open the
tsconfig.jsonfile in a text editor, then copy and paste the following into the file:{ "compilerOptions": { "target": "es2018", /* Specify ECMAScript target version: 'ES3' (default), 'ES5', 'ES2015', 'ES2016', 'ES2017', 'ES2018', 'ES2019' or 'ESNEXT'. */ "lib": ["ES2018", "DOM"], /* Specify library files to be included in the compilation. */ "allowJs": true, /* Allow javascript files to be compiled. */ "jsx": "react", /* Specify JSX code generation: 'preserve', 'react-native', or 'react'. */ }, "include": ["src/**/*"], } -
Save your changes and close the
tsconfig.jsonfile to continue.
Add a stylesheet to your project
You are now ready to create a new cascading stylesheet and add it to your project.
To add a stylesheet:
-
Change to the
src/contacts_assets/assetsdirectory.cd src/contacts_assets/assets/ -
Rename the
main.cssfile to create a new file namedmycontacts.css.mv main.css mycontacts.css -
Open the
mycontacts.cssfile in a text editor and delete the existing content. -
Define some style properties for the front-end.
For example, copy and paste the following sample styles into the file:
html { background-color: bisque; } body { font-family: Arial, Helvetica, sans-serif; display: block; margin: 10px; } h1 { color: darkblue; font-size: 32px; } div.new-entry { margin: 30px 20px 30px 20px; } .new-entry > div { margin-bottom: 15px; } table { margin-top: 12px; border-top: 1px solid darkblue; border-bottom: 1px solid darkblue; } #form { margin: 30px 0 30px 20px; } button { line-height: 20px; } #lookupName { margin-right: 12px; } -
Save your changes and close the
mycontacts.cssfile to continue. -
Change to the
src/contacts_assets/srcdirectory.cd ../src -
Open the default
index.jsfile in a text editor and delete the existing content. -
Copy and paste the following sample code into the
index.jsfile:import { Actor, HttpAgent } from '@dfinity/agent'; import { idlFactory as contacts_idl, canisterId as contacts_id } from 'dfx-generated/contacts'; import * as React from 'react'; import { render } from 'react-dom'; import '../assets/mycontacts.css'; // Import custom styles const agent = new HttpAgent(); const contacts = Actor.createActor(contacts_idl, { agent, canisterId: contacts_id }); class Contact extends React.Component { constructor(props) { super(props); this.state = { }; } async doInsert() { let name = document.getElementById("newEntryName").value; let add1 = document.getElementById("newEntryAddress1").value; let add2 = document.getElementById("newEntryAddress2").value; let email = document.getElementById("newEntryEmail").value; let phone = document.getElementById("newEntryPhone").value; contacts.insert(name, add1, add2, email, parseInt(phone, 10)); } async lookup() { let name = document.getElementById("lookupName").value; contacts.lookup(name).then(opt_entry => { let entry; if (opt_entry.length == 0) { entry = { name: "", description: "", phone: ""}; } else { entry = opt_entry[0] } document.getElementById("newEntryName").value = entry.name; document.getElementById("newEntryAddress1").value = entry.address1; document.getElementById("newEntryAddress2").value = entry.address2; document.getElementById("newEntryEmail").value = entry.email; document.getElementById("newEntryPhone").value = entry.phone.toString(); }); } render() { return ( <div class="new-entry"> <h1>My Contacts</h1> <div> Add or update contact information: <form id="contact"> <table> <tr><td>Name:</td><td><input id="newEntryName"></input></td></tr> <tr><td>Address 1 (street):</td><td><input id="newEntryAddress1"></input></td></tr> <tr><td>Address 2 (city and state):</td><td><input id="newEntryAddress2"></input></td></tr> <tr><td>Email:</td><td><input id="newEntryEmail"></input></td></tr> <tr><td>Phone:</td><td><input id="newEntryPhone" type="number"></input></td></tr> </table> </form> </div> <div> <button onClick={() => this.doInsert()}>Add Contact</button> </div> <div> Lookup name: <input id="lookupName" style={{ "line-height": "20px" }}></input> <button onClick={() => this.lookup()}>Lookup</button> </div> </div> ); } } document.title = "DFINITY CONTACT EXAMPLE"; render(<Contact />, document.getElementById('contacts')); -
Rename the modified
index.jsfile asindex.jsxby running the following command:mv index.js index.jsx -
Open the default
src/contacts_assets/src/index.htmlfile in a text editor, then replacemain.cssas the stylesheet file name withmycontacts.cssand update thebodycontents with<div id="contacts"></div>.For example:
<!doctype html> <html lang="en"> <head> <meta charset="UTF-8"> <meta name="viewport" content="width=device-width"> <title>contacts</title> <base href="/"> <link type="text/css" rel="stylesheet" href="mycontacts.css" /> </head> <body> <div id="contacts"></div> </body> </html> -
Navigate back to the root of your project directory.
For example:
cd ../../..
Start the local network
Before you can build the contacts project, you need to connect to the Internet Computer network either running locally in your development environment or running remotely on a subnet that you can access.
To start the network locally:
-
Open a new terminal window or tab on your local computer.
-
Start the Internet Computer network on your local computer by running the following command:
dfx start --backgroundAfter the local Internet Computer network completes its startup operations, you can continue to the next step.
Register, build, and deploy the application
After you connect to the Internet Computer network running locally in your development environment, you can register, build, and deploy your application locally.
To deploy the application:
-
Check that you are still in the root directory for your project, if needed.
-
Register, build, and deploy your application by running the following command:
dfx deployThe
dfx deploycommand output displays information about the operations it performs.Keep in mind that because you are running the Internet Computer locally, the identifiers displayed when you run the
dfx deploycommand are only valid on the local network.To deploy canisters on an external Internet Computer network, you must connect to that network using the
--networkcommand-line option and a specific network name or address to register identifiers on that network. For example, to deploy on the Internet Computer using the reserve network aliasic, you would run a command similar the following:dfx deploy --network=ic -
Copy the canister identifier for the
contacts_assetscanister to the clipboard or a notepad application.If you didn’t make a note of the canister identifier, you can look it up by running the following command:
dfx canister id contacts_assets
View the front-end
You can now access the front-end for the contacts program by entering the canister identifier for the assets canister in a browser.
To view the front-end:
-
Open a browser and navigate to the
localnetwork address and port number specified in thedfx.jsonconfiguration file.For example, if you are using the default binding for the local network, navigate to
127.0.0.1:8000/.To specify the canister you want the web server to display, add the
canisterIdparameter and thecontacts_assetscanister identifier to the URL using the following syntax:?canisterId=<YOUR-CANISTER-IDENTIFIER>
For example, the full URL should look similar to the following but with the
canister_identifierthat was returned by thedfx deploycommand for thecontacts_assets:http://127.0.0.1:8000/?canisterId=cxeji-wacaa-aaaaa-aaaaa-aaaaa-aaaaa-aaaaa-q
-
Verify that you are prompted with a My Contacts form.
For example:
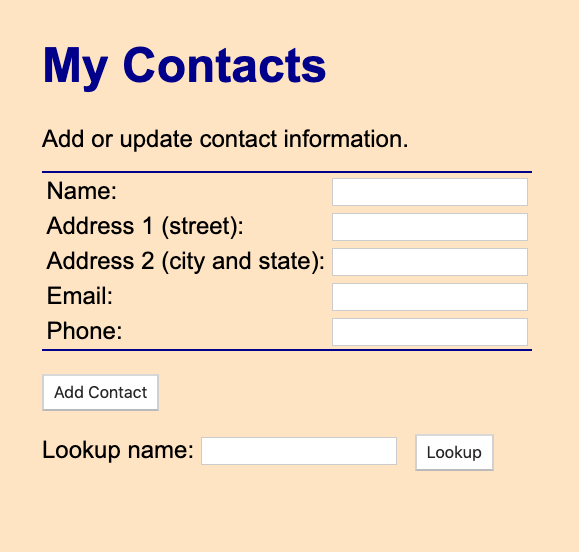
-
Create one or more test records by entering text in the Name, Address, and Email input fields and a number in the Phone input field, then clicking Add Contact.
-
Clear the form fields and type a contact name in the Lookup name field, then click Lookup to see the stored contact information.
Keep in mind that the Lookup name you type must be an exact match for the name of a contact you added.
Modify the stylesheet and test your changes
After viewing the Contacts application, you might want to make some changes.
To change stylesheet properties:
-
Open the
src/contacts_assets/public/mycontacts.cssfile in a text editor and modify its style settings.For example, you might want to change the background color or style the input form.
-
Rebuild the project with your changes by running the following command.
dfx build -
Deploy your project changes by running the following command:
dfx canister install --all --mode upgrade -
View the results in the browser by refreshing or re-entering the canister URL.
Modify the front-end or back-end code
If you want to explore further, you might want to experiment with modifying the front-end or back-end code for this tutorial. For example, you might want try modifying the tutorial to do the following:
-
Change the front-end code to clear the input fields after adding a new contact, for example, as part of an
onClickevent. -
Change the Motoko program functions to do partial instead of exact string matching on the
Namefield. -
Change the Motoko program to allow lookups based on a different field.
Stop the local network
After you finish experimenting with your program, you can stop the local Internet Computer network so that it doesn’t continue running in the background.
To stop the local network:
-
In the terminal that displays network operations, press Control-C to interrupt the local network process.
-
Stop the Internet Computer network by running the following command:
dfx stop