Use integers in calculator functions
In this tutorial, you are going to write a simple calculator program that creates a single actor with several public entry-point functions to perform basic arithmetic operations.
For this tutorial, the actor is named Calc.
The program uses the cell variable to contain an integer number that represents the current result of a calculator operation.
This program supports the following function calls:
-
The
addfunction call accepts input and performs addition. -
The
subfunction call accepts input and performs subtraction. -
The
mulfunction call accepts input and performs multiplication. -
The
divfunction call accepts input and performs division. -
The
clearallfunction clears thecellvalue stored as the result of previous operations, resetting thecellvalue to zero.
The div function also includes code to prevent the program from attempting to divide by zero.
Before you begin
Before starting the tutorial, verify the following:
-
You have downloaded and installed the DFINITY Canister SDK package as described in Download and install.
-
You have stopped any Internet Computer network processes running on the local computer.
This tutorial takes approximately 20 minutes to complete.
Create a new project
To create a new project for this tutorial:
-
Open a terminal shell on your local computer, if you don’t already have one open.
-
Change to the folder you are using for your Internet Computer projects, if you are using one.
-
Create a new project by running the following command:
dfx new calc -
Change to your project directory by running the following command:
cd calc
Modify the default configuration
For this tutorial, let’s modify the default dfx.json configuration file to use a more specific name for its main program.
To modify the default dfx.json configuration file:
-
Open the
dfx.jsonconfiguration file in a text editor. -
Change the
mainkey setting from the defaultmain.moprogram name tocalc_main.mo.For example:
"main": "src/calc/calc_main.mo",For this tutorial, changing the name of the source file from
main.motocalc_main.mosimply illustrates how the setting in thedfx.jsonconfiguration file determines the source file to be compiled.In a more complex application, you might have multiple source files instead of a single
mainprogram file. More complex applications might also have specific dependencies between multiple source files that you need to manage using settings in thedfx.jsonconfiguration file. In a scenario like that—with multiple canisters and programs defined in yourdfx.jsonfile—having multiple files all namedmain.momight make navigating your workspace more difficult. The name you choose for each program isn’t significant, but it is important that the name you set in thedfx.jsonfile matches the name of your program in the file system. -
Save your changes and close the file to continue.
Modify the default program
For this tutorial, you need to replace the default program with a program that performs basic arithmetic operations.
To replace the default program:
-
Check that you are still in your project directory, if needed.
-
Copy the template
main.mofile to create a new file namedcalc_main.moby running the following command:cp src/calc/main.mo src/calc/calc_main.mo -
Open the
src/calc/calc_main.mofile in a text editor and delete the existing content. -
Copy and paste the following sample code into the
calc_main.mofile:// This single-cell calculator defines one calculator instruction per // public entry point (add, sub, mul, div). // Create a simple Calc actor. actor Calc { var cell : Int = 0; // Define functions to add, subtract, multiply, and divide public func add(n:Int) : async Int { cell += n; cell }; public func sub(n:Int) : async Int { cell -= n; cell }; public func mul(n:Int) : async Int { cell *= n; cell }; public func div(n:Int) : async ?Int { if ( n == 0 ) { return null // null indicates div-by-zero error } else { cell /= n; ?cell } }; // Clear the calculator and reset to zero public func clearall() : async Int { if (cell : Int != 0) cell -= cell; return cell }; };You might notice that this sample code uses integer (
Int) data types, enabling you to use positive or negative numbers. If you wanted to restrict the functions in this calculator code to only use positive numbers, you could change the data type to only allow natural (Nat) data. -
Save your changes and close the file to continue.
Start the local network
Before you can build the calc project, you need to connect to the Internet Computer network either running locally in your development environment or running remotely on a subnet that you can access.
Starting the network locally requires a dfx.json file, so you should be sure you are in your project’s root directory.
For this tutorial, you should have two separate terminal shells, so that you can start and see network operations in one terminal and manage your project in another.
To start the network locally:
-
Open a new terminal window or tab on your local computer.
-
Navigate to the root directory for your project, if necessary.
-
You should now have two terminals open.
-
You should have the project directory as your current working directory.
-
-
Start the Internet Computer network on your local computer by running the following command:
dfx startAfter you start the local network, the terminal displays messages about network operations.
-
Leave the terminal that displays network operations open and switch your focus to your original terminal where you created your new project.
Register, build, and deploy the application
After you connect to the Internet Computer network running locally in your development environment, you can register, build, and deploy your application locally.
To deploy the application locally:
-
Check that you are still in the root directory for your project, if needed.
-
Register, build, and deploy your application by running the following command:
dfx deployThe
dfx deploycommand output displays information about the operations it performs.
Verify calculator functions on the canister
You now have a program deployed as a canister on your local Internet Computer network.
You can test the program by using dfx canister call commands.
To test the program you have deployed:
-
Use the
dfx canister callcommand to call thecalccanisteraddfunction and pass it the input argument10by running the following command:dfx canister call calc add '(10)'When you pass an argument enclosed by the single quotation marks and parentheses,the interface description language (IDL) parses the argument type, so you don’t need to specify the argument type manually.
Verify that the command returns the value expected for the
addfunction. For example, the program displays output similar to the following:(10)
-
Call the
mulfunction and pass it the input argument3by running the following command:dfx canister call calc mul '(3)'Verify that the command returns the value expected for the
mulfunction. For example, the program displays output similar to the following:(30)
-
Call the
subfunction and pass it the input argument5of typenumberby running the following command:dfx canister call calc sub '(5)'Verify that the command returns the value expected for the
subfunction. For example, the program displays output similar to the following:(25)
-
Call the
divfunction and pass it the input argument5by running the following command:dfx canister call calc div '(5)'Verify that the command returns the value expected for the
divfunction. For example, the program displays output similar to the following:(opt 5)
You might notice that the
divfunction returns an optional result. The program makes the result optional to enable thedivfunction to returnnullin the case of a division-by-zero error.Because the cell variable in this program is an integer, you can also call its functions and specify negative input values. For example, you might run the following command:
dfx canister call calc mul '(-4)'which returns:
(-20)
-
Call the
clearallfunction and verify it resets thecellvalue to zero:dfx canister call calc clearallFor example, the program displays output similar to the following:
(0)
Test functions in a browser
The canister interface description language—often referred to as Candid or more generally as the IDL—provides a common language for specifying the signature of a canister service.
Candid provides a unified way for you to interact with canisters that are written in different languages or accessed using different tools.
For example, Candid provides a consistent view of a service whether the underlying program is native Rust, JavaScript, or Motoko.
Candid also enables different tools—such as the dfx command-line interface and the Network Nervous System application—to share a common description for a service.
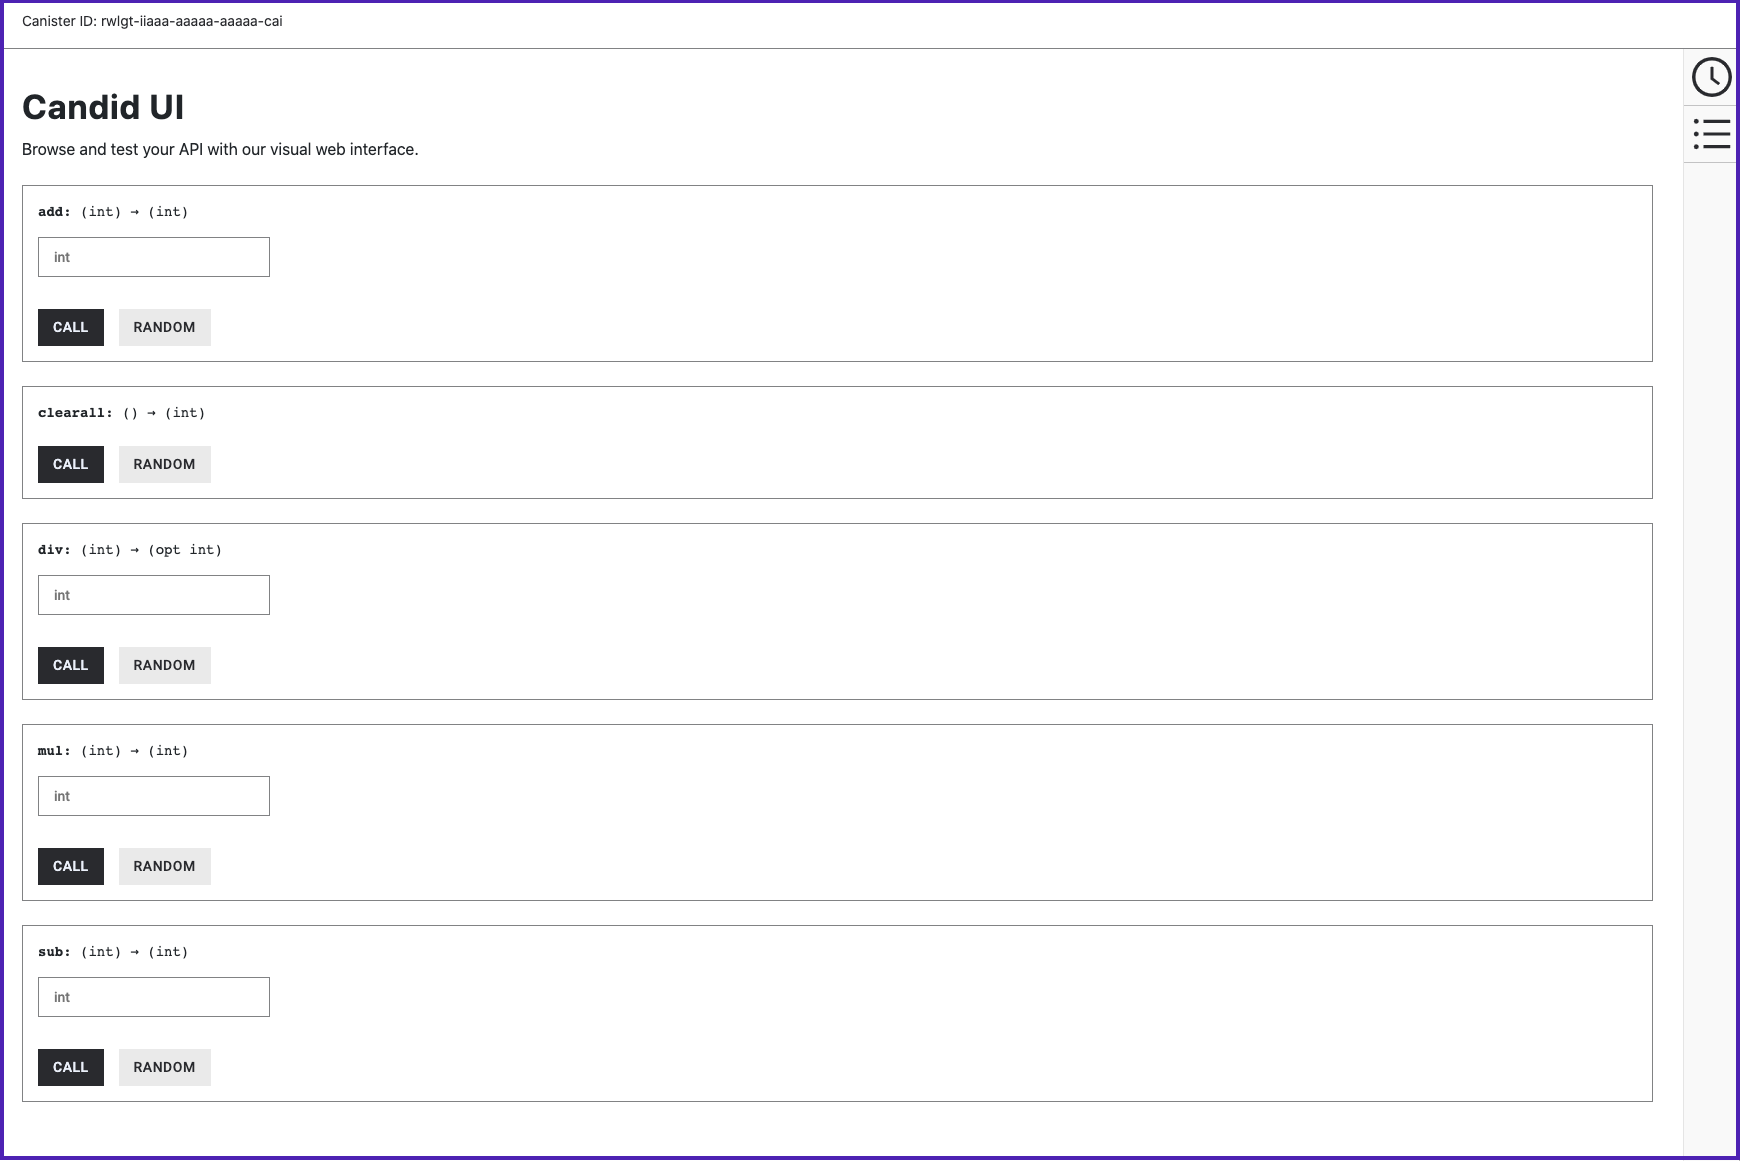
Based on the type signature of the actor, Candid also provides a web interface that allows you to call canister functions for testing and debugging.
After you have deployed your project locally using the dfx deploy or dfx canister install command, you can access the Candid web interface endpoint in a browser.
This web interface—the Candid UI—exposes the service description in a form, enabling you to quickly view and test functions and experiment with entering different data types without writing any front-end code.
To use the Candid web interface to test canister functions:
-
Find the Candid UI canister identifier associated with the current project using the
dfx canister id __Candid_UIcommand.dfx canister id __Candid_UIThe command displays the canister identifier for the Candid UI with output similar to the following:
r7inp-6aaaa-aaaaa-aaabq-cai
-
Copy the Candid UI canister identifier so that it is available in the clipboard.
-
If you’ve stopped the Internet Computer, restart it locally by running the following command:
dfx start --background -
Open a browser and navigate to the address and port number specified in the
dfx.jsonconfiguration file.By default, the
localnetwork binds to the127.0.0.1:8000address and port number. -
Add the required
canisterIdparameter and the Candid UI canister identifier returned by thedfx canister idcommand to the URL.For example, the full URL should look similar to the following but with the
CANDID-UI-CANISTER-IDENTIFIERthat was returned by thedfx canister idcommand:http://127.0.0.1:8000/?canisterId=<CANDID-UI-CANISTER-IDENTIFIER>
The browser displays a form for you to specify a canister identifier or choose a Candid description (
.did) file.If you aren’t sure which canister identifier to use, you can run the
dfx canister idcommand to look up the identifier for a specific canister name. -
Specify the canister identifier or description file for your application into the Provide a canister ID field, then click Go to display the service description.
-
Review the list of function calls and types defined in the program.
-
Type a value of the appropriate type for a function or click Random to generate a value, then click Call or Query to see the result.
Note that depending on the data type, the Candid interface might display additional configuration settings for testing functions. For example, if a function takes an array, you might need to specify the number of items in the array before entering values.
Stop the local network
After you finish experimenting with your program, you can stop the local Internet Computer network so that it doesn’t continue running in the background.
To stop the local network:
-
In the terminal that displays network operations, press Control-C to interrupt the local network process.
-
Stop the Internet Computer network by running the following command:
dfx stop